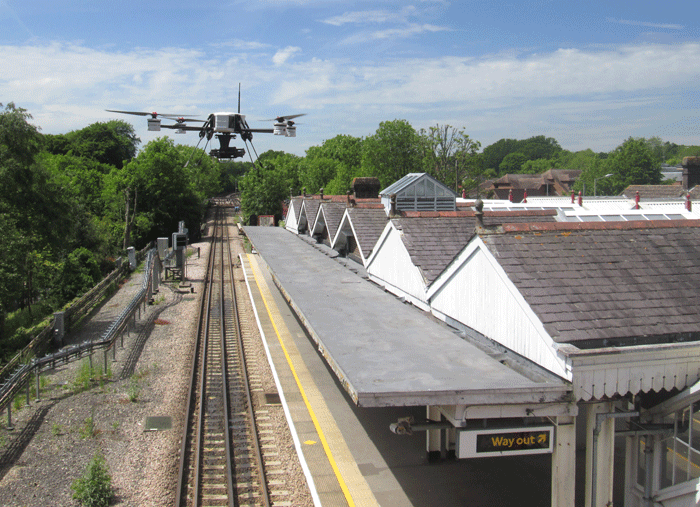
The sky’s no limit for drone photography
 Photographers in many sectors, from property to filmmaking, will be aware that drones & UAVs can be a wise investment. But whether you’re looking to win new business or an Oscar, you’ll want to be sure you can capture the best images possible.
Expert tips from Hovershotz: Making the most of drones for filming and photography
Who needs aerial images?
When you consider the creative possibilities of aerial filming and its undisputed advantages over manned helicopter hire, it’s no wonder that, until recently, television and film work accounted for 75% of UK commercial drone activity. Drones are a dream come true for videographers & filmmakers – reducing hazards and costs while maximising versatility and manoeuvrability. And the results speak for themselves: dynamic images and unique perspectives.
Seeing the commercial potential for their own applications, the property and construction industries have become the biggest sources of aerial work, with drones being used for property marketing, building and site inspections, land surveying and mapping, as well as for agriculture and video filming.
Getting started: equipment
In an innovation-led industry that moves faster than an FPV racing drone, there’s plenty of scope to run up large bills in pursuit of the latest tech for amazing aerial images. (It’s worth noting that it’s not just camera technology that evolves, but other drone components too, such as gimbals and even obstacle sensors.) That said, even entry-level drones have good on-board cameras.
The drone
You don’t have to go large to get good results. Small drones ‘like the Phantoms and the Inspires’ do the majority of commercial aerial photography work. Although small drones (20kg or less for regulatory purposes) are not as stable as their larger counterparts. The heavier the drone, the greater its stability and the better its images, that’s why Hovershotz deploy the DJI S900 hexacopter in the Lake District, a drone that can cope with the Cumbrian weather.
Depending on your needs (and budget!), you may decide to splash out on more than one drone. Different models are suited to different types of aerial work – but don’t forget that they may need different licences too, as regulatory requirements vary according to weight.
The camera
You don’t need a fancy camera to get high-quality aerial images. An on-board camera is your starter for ten. Obviously Hovershotz being a professional drone operator use a Lumix GH4 external camera but you can still get good results using drones with built in cameras, such as the X3 or X5 on the DJI Inspire 1.
External cameras are for when you’re Professional UAV camera with optical zoom
If you’re looking to upgrade, remember that a heavier camera will drain your drone’s battery more quickly and reduce flying time. It sounds obvious, but it’s something that can be easily forgotten while you’re caught up in the thrill of a flight.
Gimbal
A stabilisation mechanism that steadies the camera, a gimbal guards against those frustrating blurry images. Essential for smooth video footage, they also let you move the camera, giving photographers more flexibility with composition.
Most drones have a built-in gimbal for their onboard cameras, but you’ll need a separate one for an external camera. For perfectly smooth images, look for a three-axis gimbal. Again, keep battery life in mind and make sure you’re not asking too much of your drone in terms of payload.
Transmitter
There are different ways to monitor your drone’s camera. If your transmitter has a built-in video monitor (or attachments for a smartphone), you’ll be able to see the live video feed on your mobile device.
Bear in mind that what you see depends on the quality of your equipment – if you have an HD kit, you can expect to enjoy top-quality footage.
Your crew
Safety is paramount, so it often makes sense to divvy up the tasks on a photography shoot. You may be surprised at just how many people you need for some scenarios – and you’re not alone. Hovershotz have at our disposal, a dedicated licenced pilot, where needed a dedicated camera operator (usually for complex video such as action sports, where the pilot can concentrate on safely flying the drone, while the camera operator captures perfect footage), observers and spotters (for safe drone operation in crowded urban areas or at events . There are many one man bands out there that try and fly the drone, while at the same time try and operate the camera, with no regard for crowd control – as can be expected, the results from these one man drone operators is often poor in comparison.
Some drones have dual operator control – just as well when you consider that most aerial photography cameras can’t optically zoom, and pilots have their work cut out to get the right focal length to frame a shot. Having a dual pilot system – where one operator controls the UAV and the other operates the camera – maintains safety, as both can focus on the job at hand.
In fact, you might need anything from a two-person operation to a crew of eight or 10 to tick all the boxes. Take the scenario of a shoot in a local council playground, for example. There might be several entrances to the area, so you’d potentially want one person at each with a walkie talkie (a step up from a traffic cone and warning notice). You’ll need observers to alert you to everything from birds to helicopters, and you may have specialist roles, such as gimbal operator, too.
But we’re getting ahead of ourselves. There are plenty of jobs to do before you’re ready for take-off…
Pre-flight planning
The beauty of drone photography is that it can capture views that would otherwise be tricky, or even impossible, to achieve. The results can be breathtaking – so it’s easy to get carried away with the exhilaration of the experience and fail to notice a pigeon in the wrong place, or that giveaway shadow of your drone in shot.
Even if you have a co-pilot to help you out, you may only have 20 minutes in the air to get it right. Good planning will minimise the potential for problems that waste time and battery power.
Know your subject
Research your subject thoroughly and decide on your desired image composition, so you can launch your drone exactly where you want it. You don’t want to be flying around in search of the perfect shot.
Positioning
This is a biggie for aerial images: consider time of day and the position of the sun. You don’t want overexposed shots or your subject obscured by shadow.
Timing
Where possible, Hovershotz aim to film in the ‘golden hour’, which occurs at dawn and dusk, for optimal light levels and a beautiful soft ‘glow’.
In colour temperature terms, the light is warm and golden because more of the blue wavelengths are scattered.
Colour temperature
Getting to grips with colour temperature charts may sound daunting, but it will pay dividends for your photography skills.
Different light sources emit their own colours, or ‘colour temperature’, which vary from red to blue. Candles and sunsets give off light that’s close to red, giving a ‘warm’ look to images, while blue skies give off a cooler, blue light.
Confusingly, lower colour temperatures are called warm colours, and vice versa. Once you’ve got your head around that, you’re ready to find out how to capture accurate colours in tricky lighting conditions such as hazy skies and sunsets. How? Check where they sit in the colour temperature scale and the corresponding recommended camera settings.
Know your camera
Being formally trained and qualified photographers, gives Hovershotz the knowledge of being able to set up and control the camera (even in the air), to capture the perfect shot. Many drone operators are just gadget fans who have taken their RC flying hobby into a job but are not qualified photographers and have no real idea how to set up a camera and take professional aerial photographs.
Exposure
One of the first things that needs doing, is getting the correct exposure, and how to set it before and during flight.
Although very elaborate cameras will be able to zoom and focus while airborne, many won’t offer this luxury, so you’ll need to figure out the best settings beforehand. Specifically, we’re talking shutter speed, aperture and ISO, which all work together to create exposure.
Shutter speed
Shutter speed is one of the most important – possibly the most important – camera setting for aerial drone photography.
Unless you’re aiming for artistic blur, you’ll want sharp images. Use the fastest shutter speed you can, to ‘freeze’ the movement of the subject and offset the vibration of the drone.
Keep slower shutter speeds for shooting video, as you’ll want a certain amount of motion blur for smooth playback.
Aperture
Aperture affects depth of field – happily not an issue in aerial drone photography. This is good news, because you’ll want the largest aperture possible to get short shutter speeds. Find the largest aperture at which your lens is sharp, and go with that.
(If you’ve got an integrated and/or small camera, it may have a fixed aperture.)
ISO
The ISO setting gives you the flexibility to capture subjects in a range of lighting conditions. For example, changing to a higher ISO value lets you continue taking photos as light levels drop, without using flash.
You might say that the ‘three Rs’ of aerial photography are resolution, resolution, and resolution, so the lower the ISO setting, the better.
Metering
Your camera’s light meter determines the correct shutter speed, aperture and ISO for optimal exposure. There are several metering modes available, so it’s useful to know what each one does. The sun is a pivotal factor in aerial photography, so choosing the appropriate metering mode can work wonders.
In Hovershotz next blog article we will discuss how to set up the DJI X5 micro four thirsd camera for perfect still image shotz and 4K video.
Whether you’ve got 100 grand flying a Red Epic on a Shotover U 1 drone up in the air or you’re experimenting with a DJI Phantom 4 drone at the other end of the scale, safety is paramount. Whatever happens – including things that go wrong – you, as the pilot, are in charge, so you’ll want to make sure you’ve got all your boxes ticked.
Permissions and other rules
There’s a lot to think about here – from permissions for take-off and landing to model release forms, and regulations around selling your images.
While amateur drone flyers don’t need official permission or training, if you’re operating a drone commercially in the UK, you need annual Permission for Commercial Operation from the Civil Aviation Authority (CAA PFCO).
You’ll also need to be aware of the relevant UK law, including CCTV surveillance, privacy and data protection, which apply to any collection of personal information, including drone footage.
Hovershotz aerial drone photography video & Inspections are the leading professional drone operator company in the North West of England covering Cumbria, Lancashire & the Lake District.